

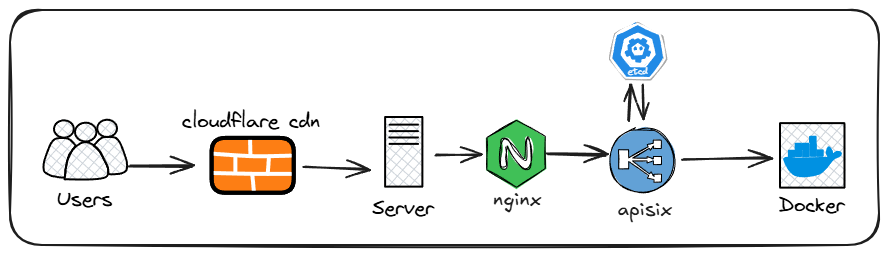
在没部署 apisix 之前,用户直接访问 api.demo.com 就可以直接调用 API,没有任何限制
部署 apisix 后,添加了一层 API 网关,用户请求需要鉴权和验证 IP
部署Apache APISIX®
Apache APISIX®支持 docker 部署,部署前请先安装好 docker 环境
先创建一个 apisix 文件夹
mkdir apisix && cd apisix
我们创建docker-compose.yml文件和config.yaml文件,分别是 docker 编排文件和 apisix 配置文件
#docker-compose.yml
version: "3.8"

services:
  etcd:
    image: quay.io/coreos/etcd:v3.5.18
    command: >
      /usr/local/bin/etcd
      --name=etcd1
      --data-dir=/etcd-data
      --listen-client-urls=http://0.0.0.0:2379
      --advertise-client-urls=http://etcd:2379
      --listen-peer-urls=http://0.0.0.0:2380
      --initial-advertise-peer-urls=http://etcd:2380
      --initial-cluster=etcd1=http://etcd:2380
      --initial-cluster-state=new
    volumes:
      - ./etcd-data:/etcd-data
    expose:
      - "2379"
      - "2380"

  apisix:
    image: apache/apisix:3.14.1-debian
    depends_on:
      - etcd
    volumes:
      - ./config.yaml:/usr/local/apisix/conf/config.yaml:ro
    command: >
      sh -lc "apisix start -c /usr/local/apisix/conf/config.yaml && tail -f /usr/local/apisix/logs/error.log"
    ports:
      - "127.0.0.1:9080:9080"   # API 入口(数据面)
      - "127.0.0.1:9180:9180"   # Admin API + Dashboard(/ui)
Admin API Key 自行更改,必须足够复杂并且不要泄露给别人,输入ip addr show docker0查询自己的 docker 网桥 ip 或者使用172.16.0.0/12匹配所有的 docker 网络 ip
#config.yaml
deployment:
  role: traditional
  role_traditional:
    config_provider: etcd

  admin:
    # 内嵌 Dashboard(/ui)开关:默认启用
    enable_admin_ui: true

    # Admin API Key:Dashboard 登录、curl 调 Admin API 都用它
    admin_key:
      - name: admin
        role: admin
        key: "Admin API Key"  #建议复杂一些,并且不要泄露

    # Admin API 的 IP 白名单
    # 注意:docker 端口映射下,APISIX 容器里看到的源 IP 往往是 docker 网桥网关(常见 172.17.0.1)。
    # 你想“只允许本机访问”的核心已经由 ports 绑定 127.0.0.1 保证了;
    # 这里建议同时放行 127.0.0.1 和 docker 网桥网关 IP(仍然是本机)。
    allow_admin:
      - 127.0.0.1/32
      - 172.16.0.0/12   # 如果你的 docker 网桥不是 172.17.0.1,改成实际网关 IP

    # 让容器内监听 0.0.0.0(否则 docker 端口映射可能连不上)
    admin_listen:
      ip: 0.0.0.0
      port: 9180

etcd:
  host:
    - "http://etcd:2379"
  prefix: "/apisix"
  timeout: 30
然后在 apisix 目录下启动容器
docker compose up -d
使用 docker compose ps 命令查看容器是否都在 UP 状态

配置Apisix
新版 Apache APISIX 已经内置了一个 Web 管理面板(Dashboard UI) ,默认启用
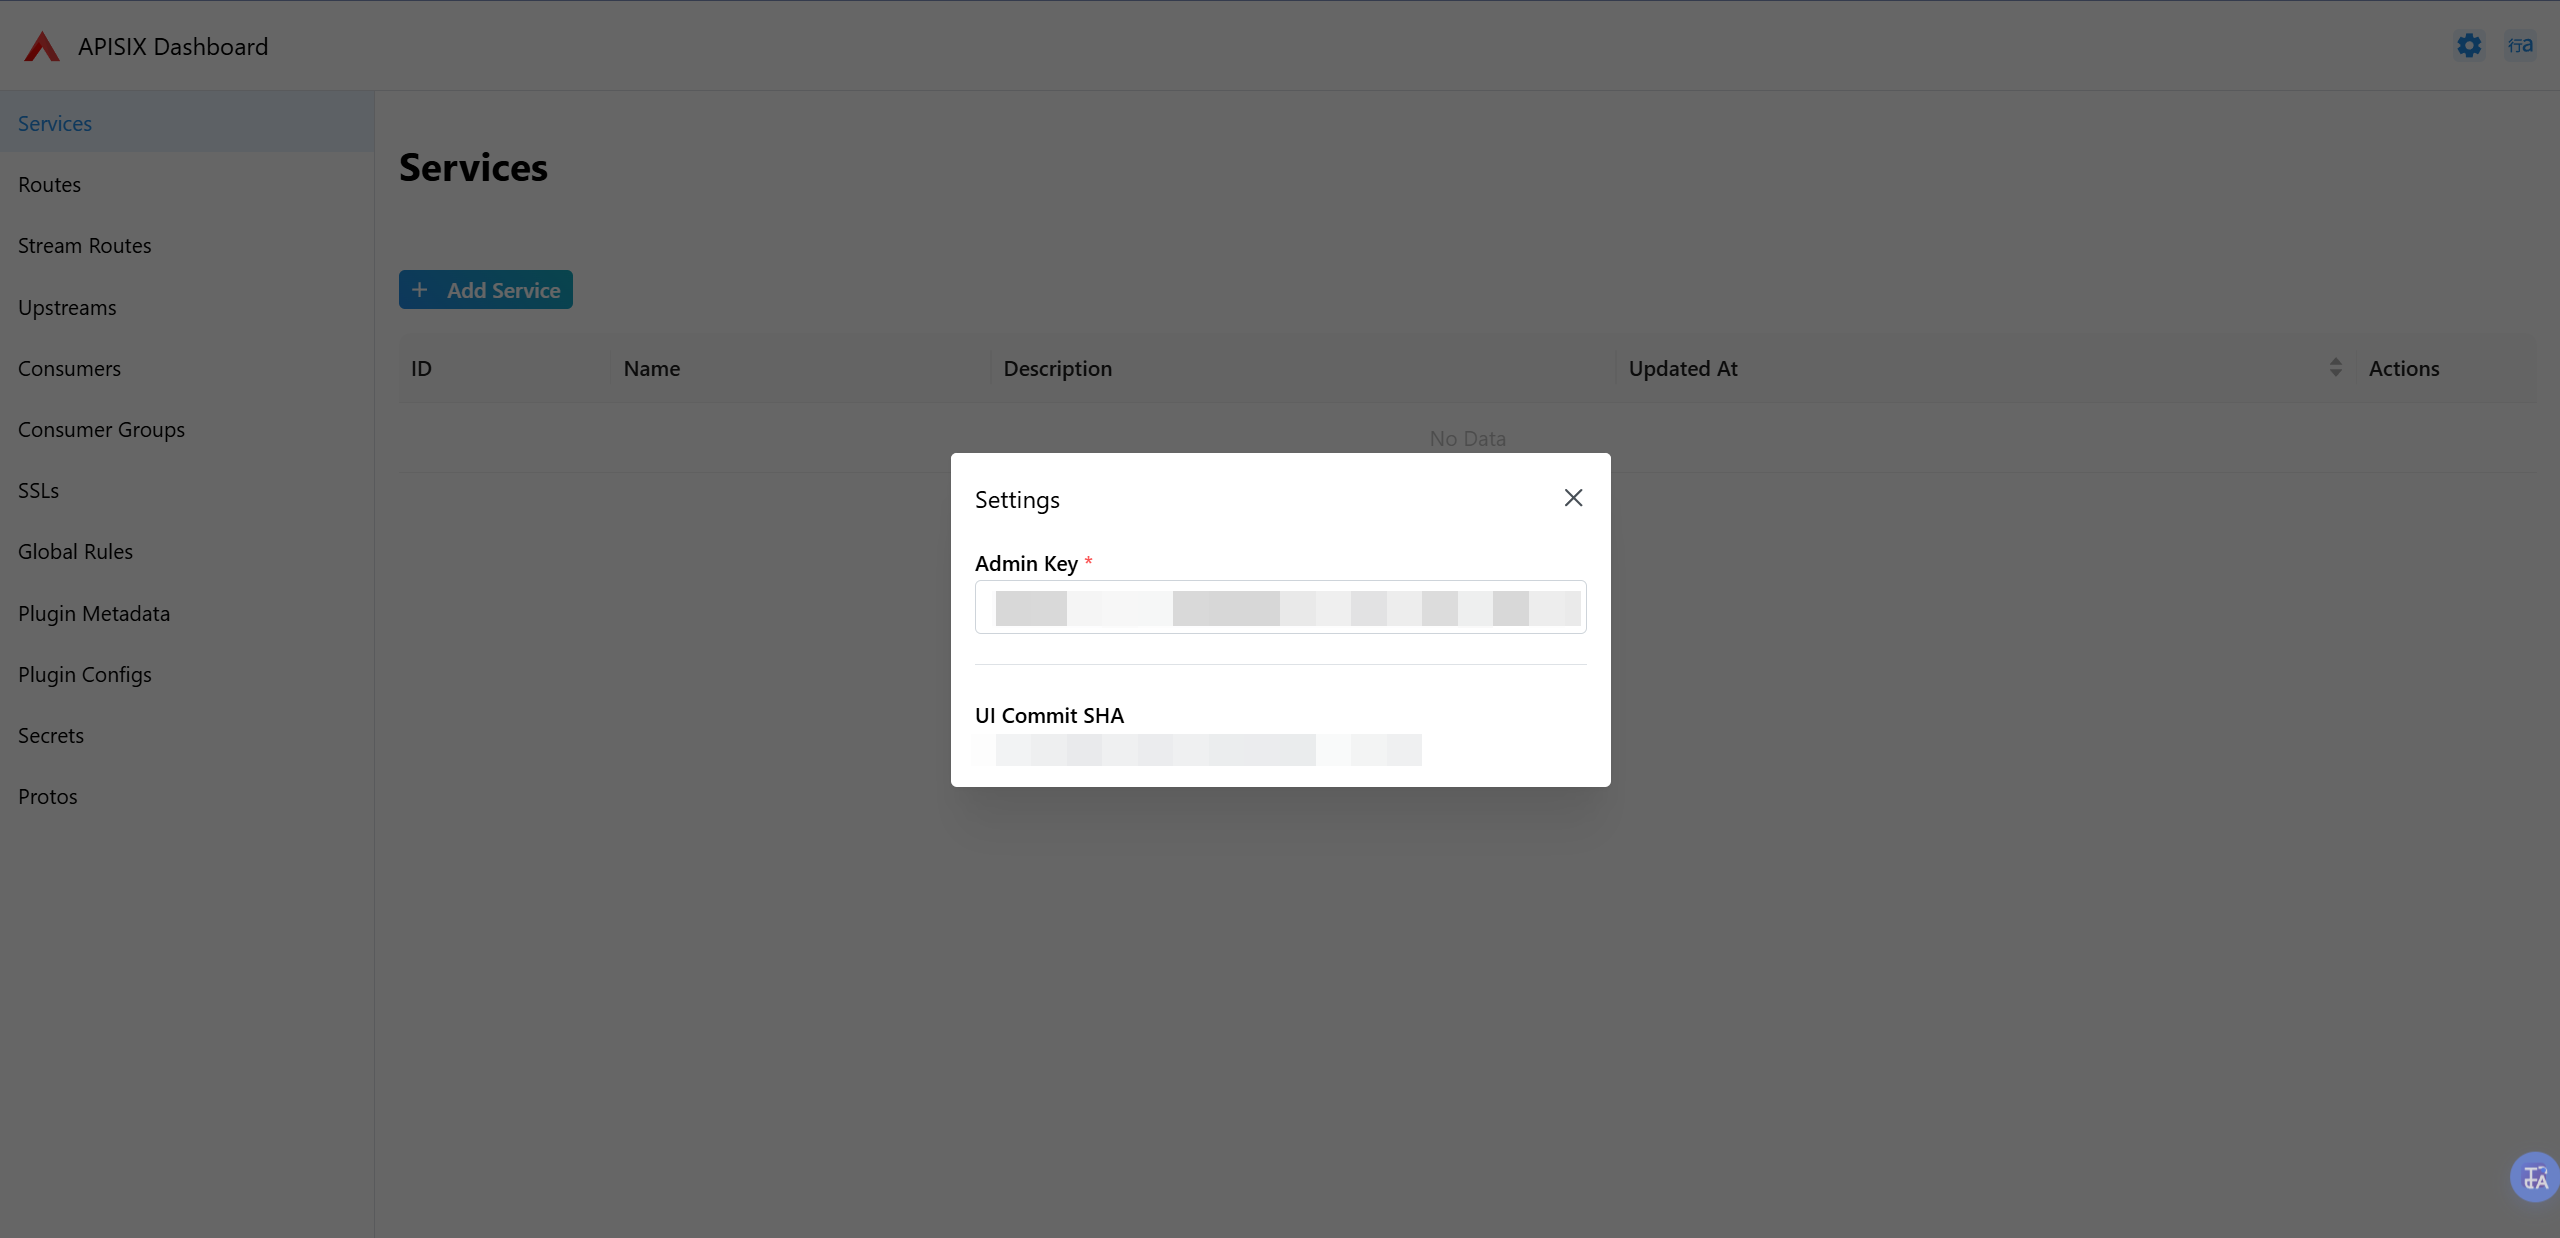
访问http://127.0.0.1/ui 就可以进入到APISIX Dashboard 中,在第一次访问时需要填入你config.yaml文件中配置的Admin API Key
我们需要配置 Routes、Consumers 和 Upstreams
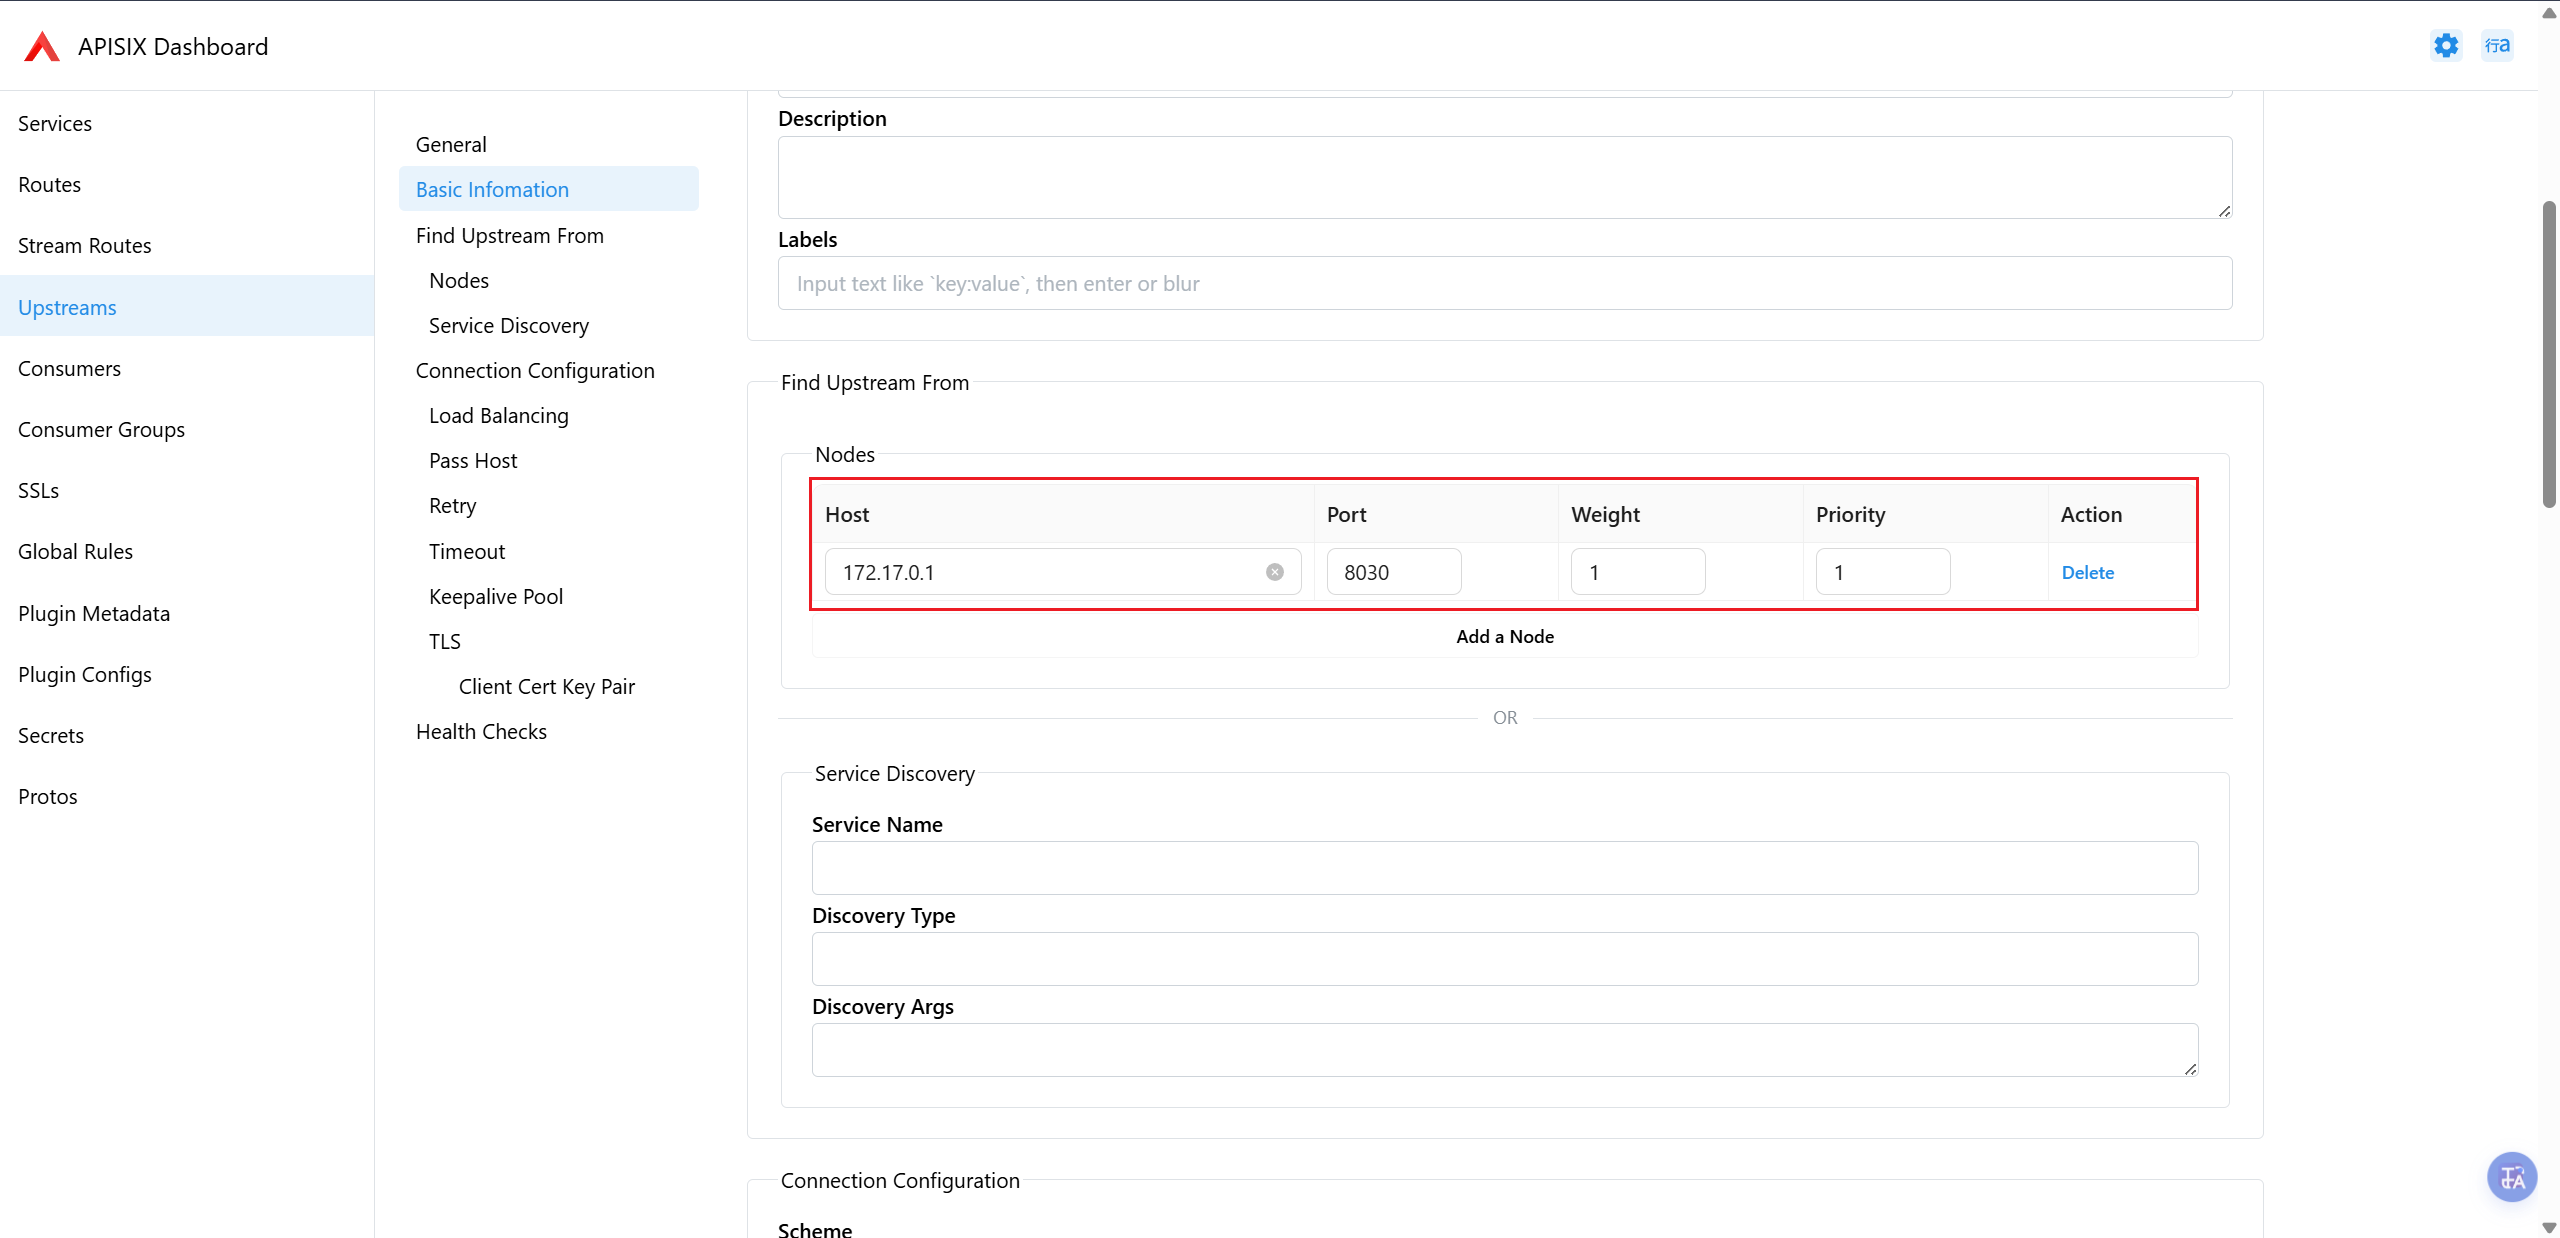
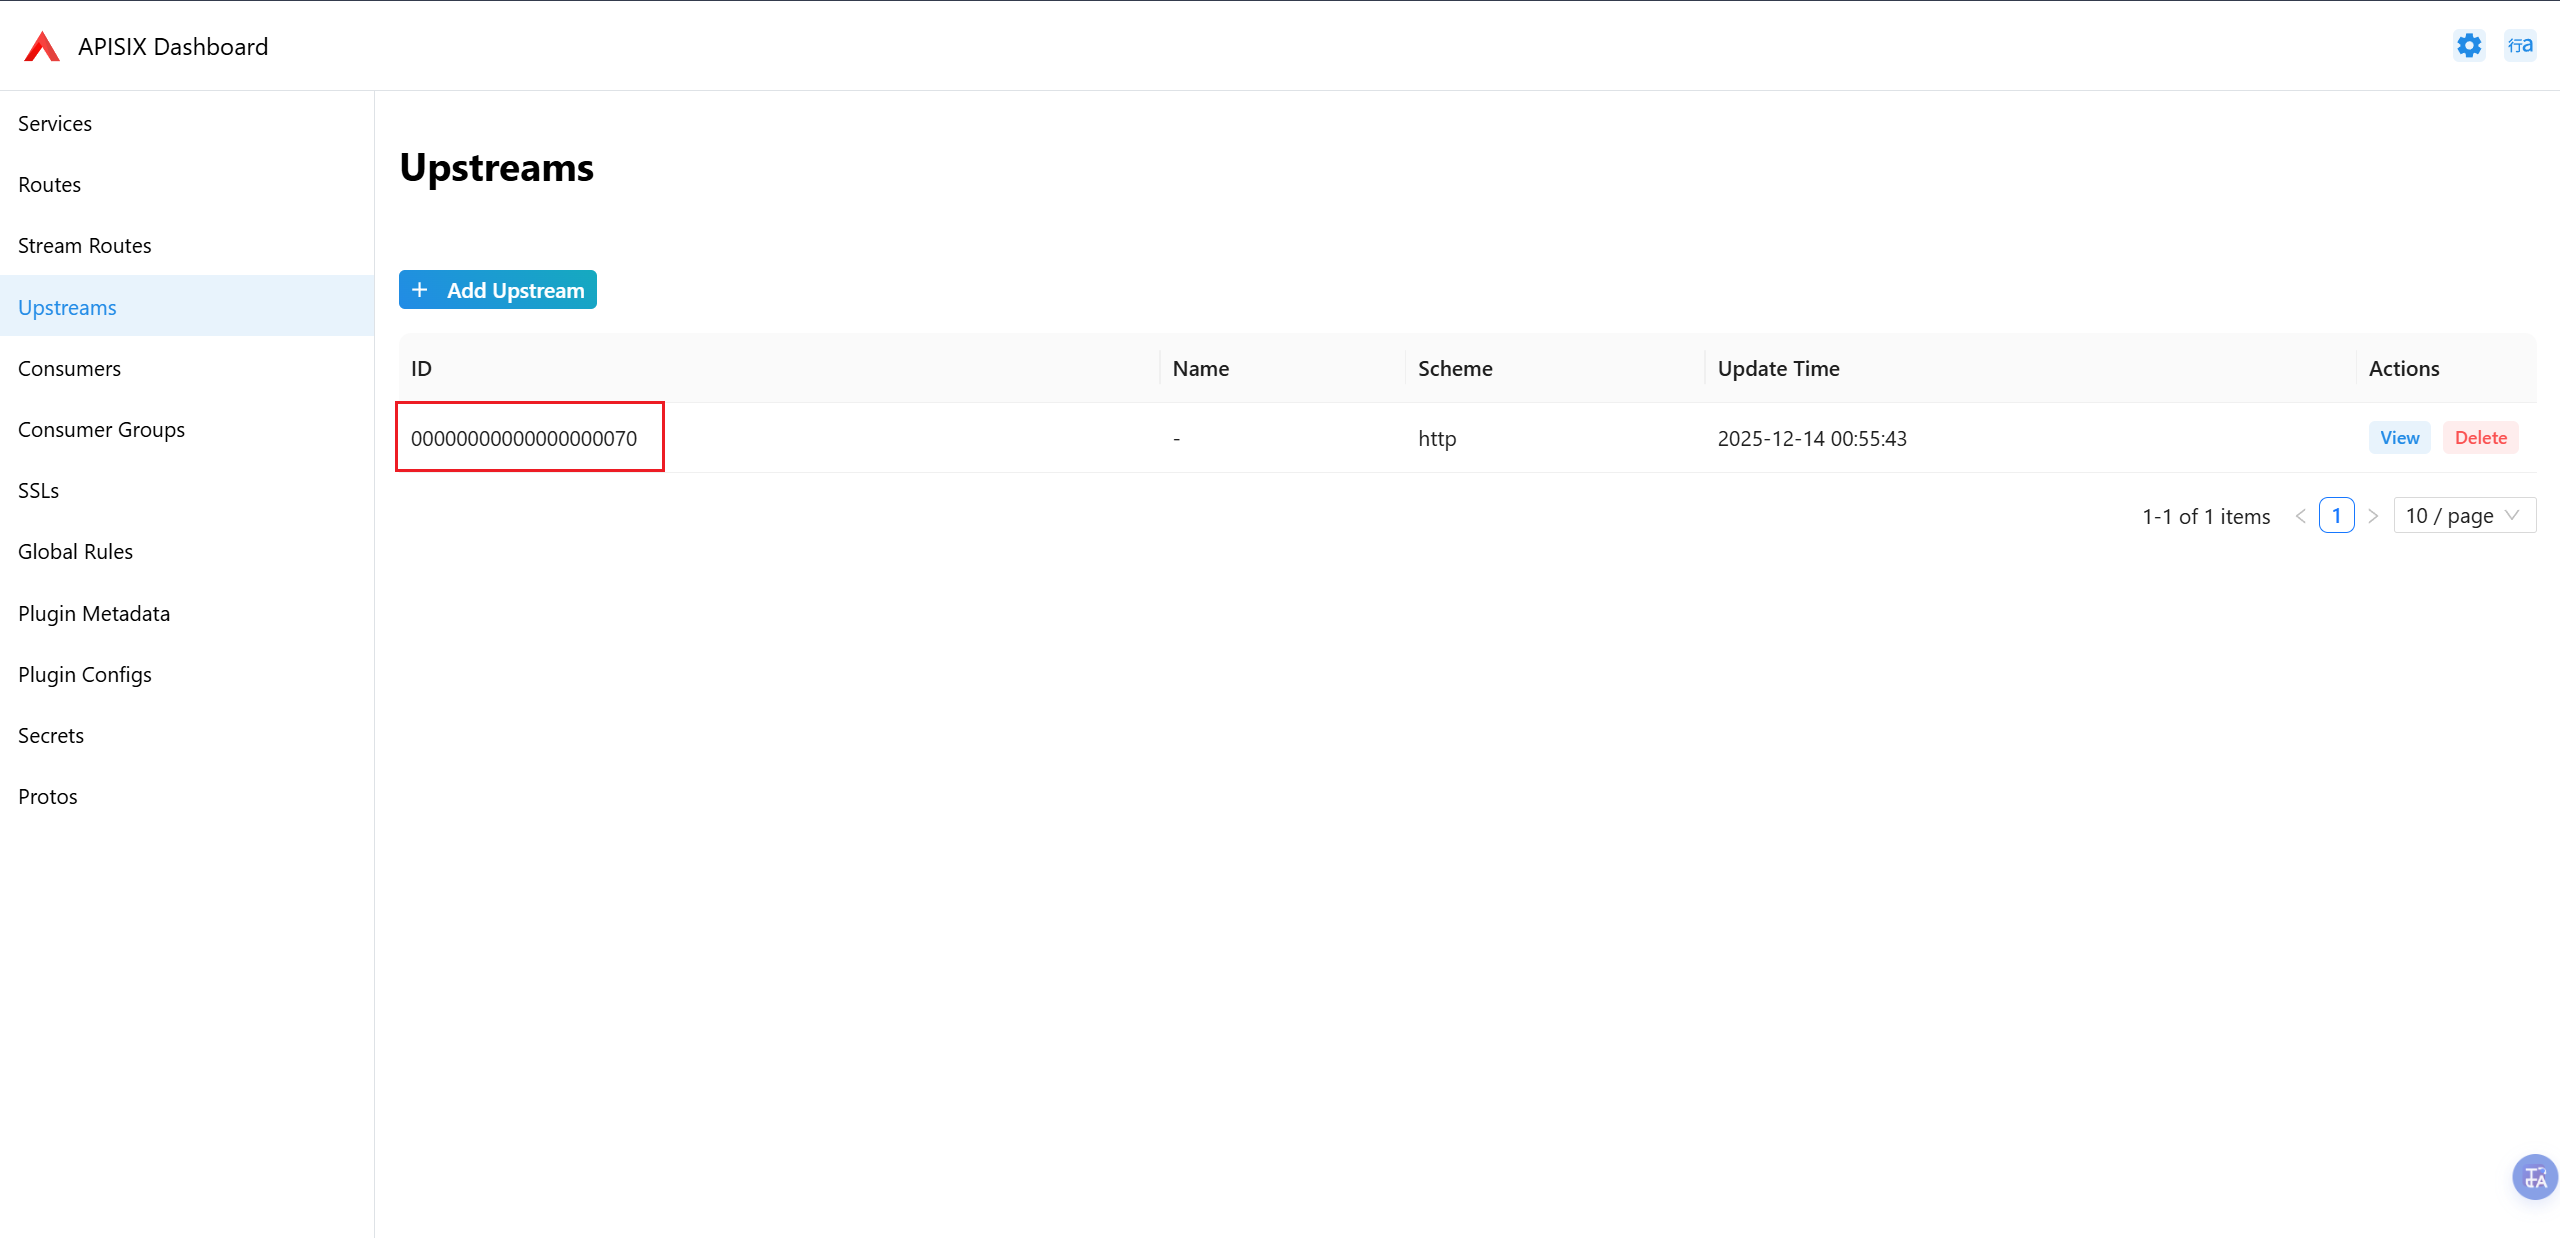
配置Upstreams
Upstreams 是配置后端,即 apisix 网关通过路由和鉴权后将请求转发到的是哪个后端
点击 Upstreams——>Add Upstreams 菜单添加,只需要配置 Find Upstreams From 里的 Nodes 即可。
如果你 api 的后端也是 docker 部署的,那么 Host 必须是 docker 网桥 ip(使用ip addr show docker0查看),端口为 api 后端容器的端口,Weight(权重) 和Priority(优先级) 根据自身情况配置,配置完后保存即可。
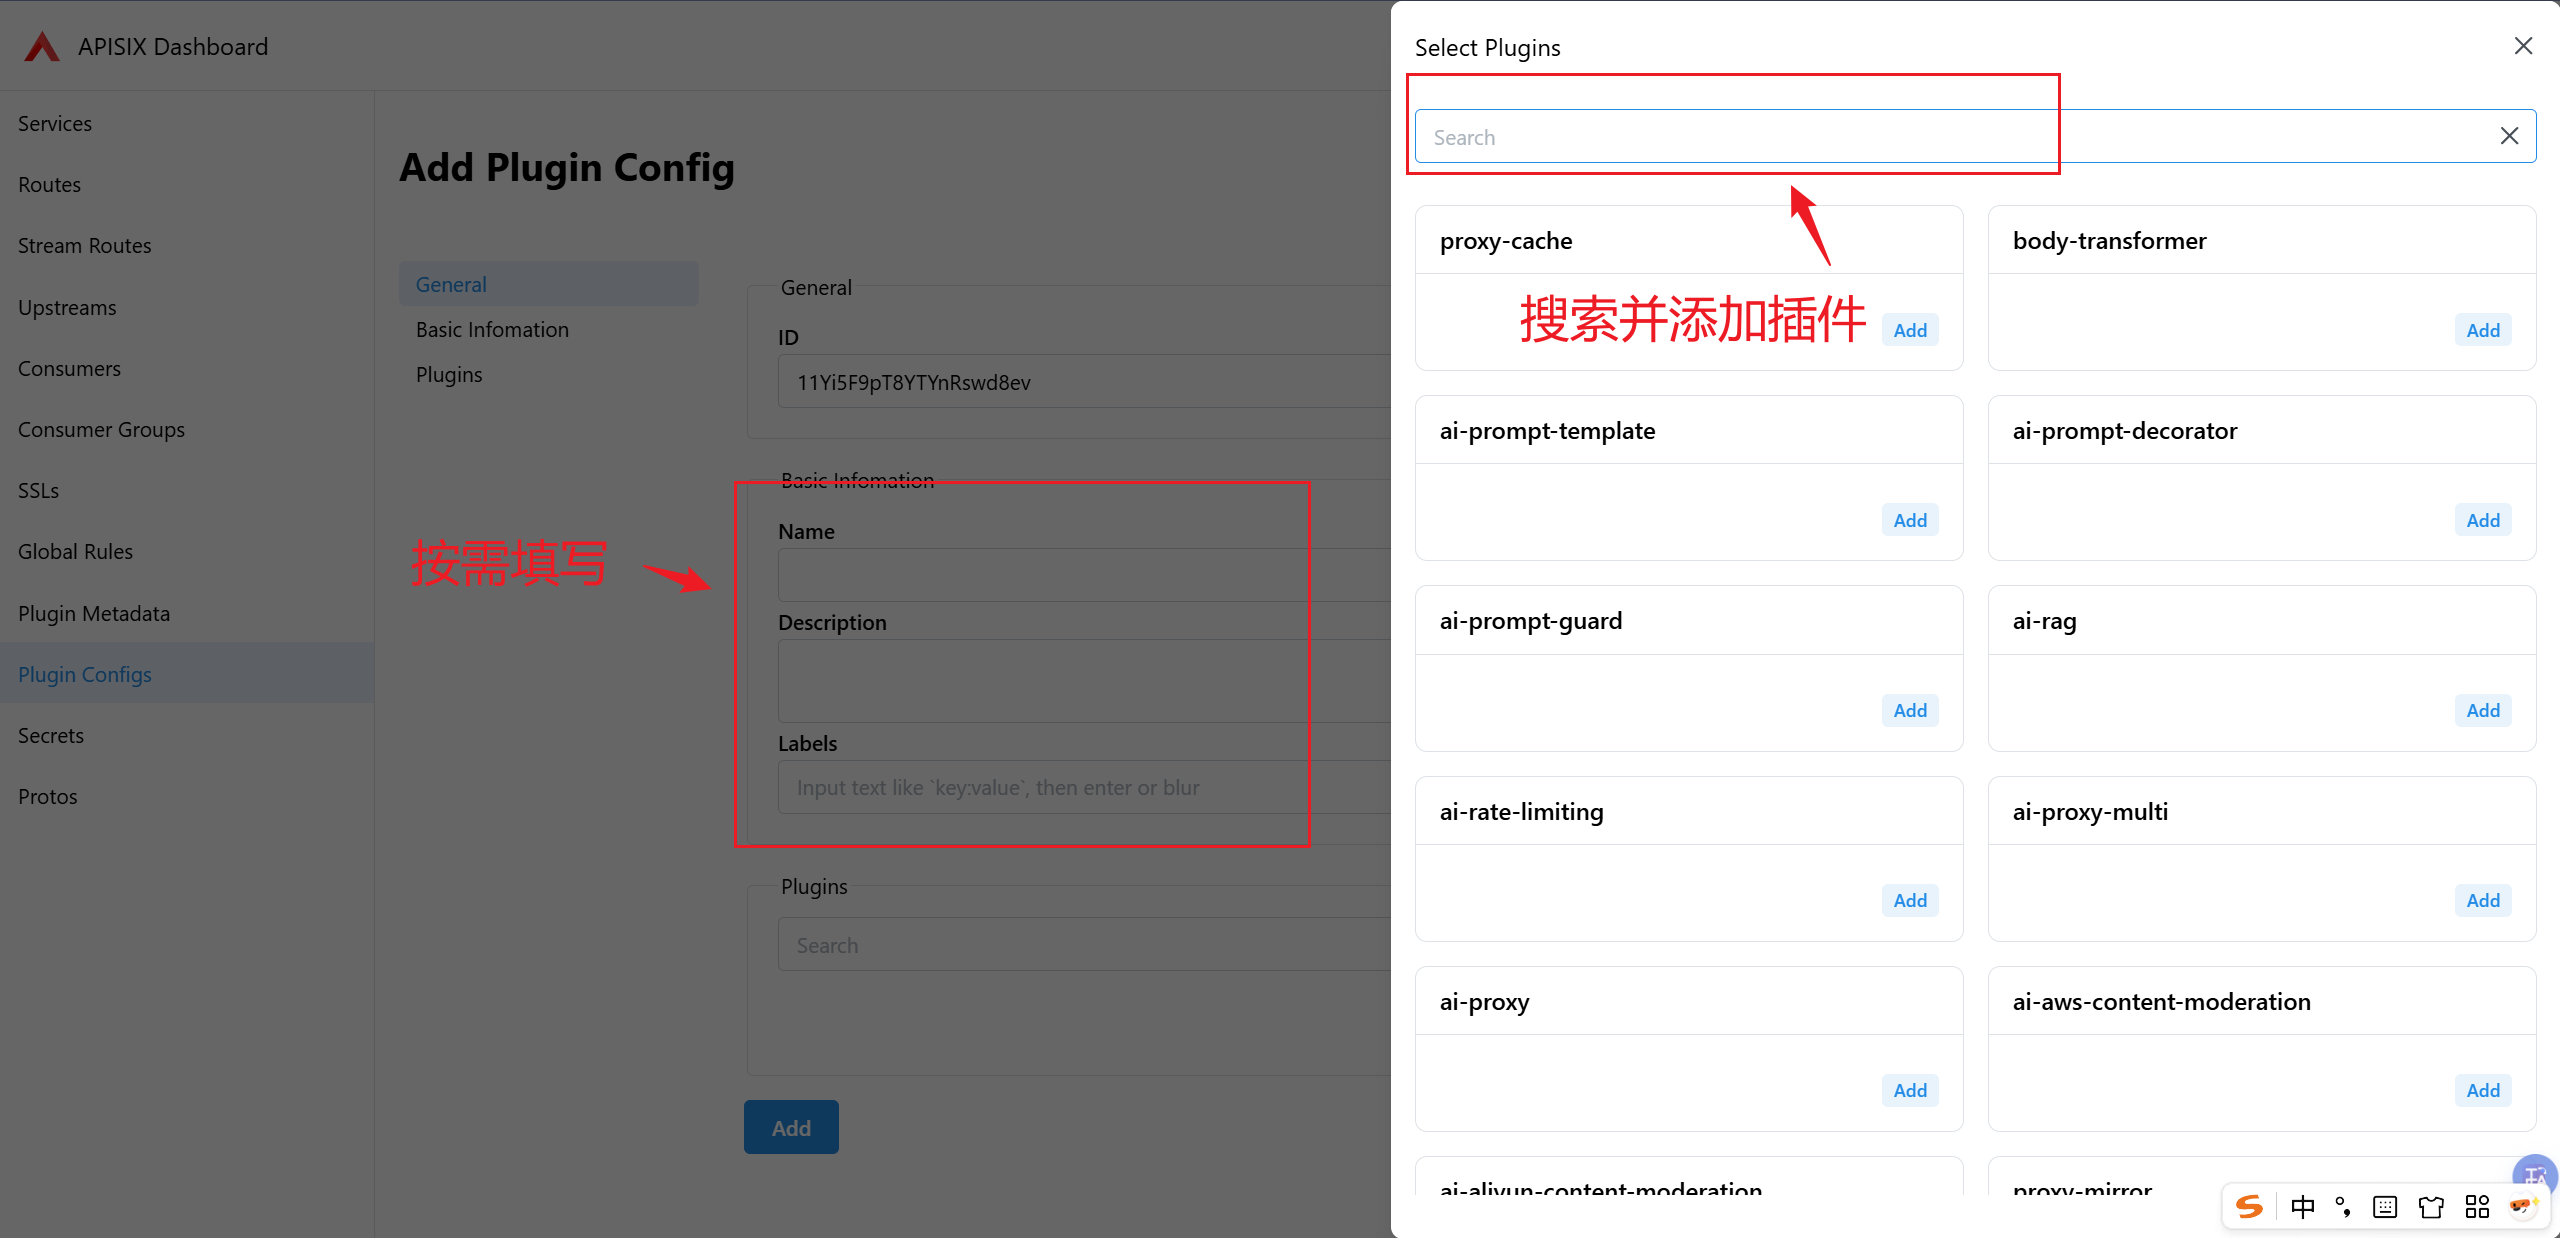
配置Plugin Config
需要设置 1 个 Plugin Config 和使用
key-auth、serverless-pre-function、response-rewrite和real-ip四个插件。
点击 Plugin Config——>Add Plugin Config 进入 Add Plugin Config 页面
配置Routes Plugin Config
配置key-auth插件
搜索key-auth并配置如下内容,这段代码是从请求的 Header 或 URL 参数里取出 API Key 来做认证。
{
  "hide_credentials": false,
  "header": "apikey",
  "query": "apikey"
}
搜索key-auth并配置如下内容
··
配置serverless-pre-function插件
搜索serverless-pre-function并配置如下内容,这段代码是在请求被转发到上游(proxy)之前执行一段 Lua 代码,用来做按 Consumer维度的 IP 白名单限制。
{
  "phase": "before_proxy",
  "functions": [
    "return function(conf, ctx)\n  local consumer = ctx.consumer\n  local allow = consumer and consumer.labels and consumer.labels.allow_ips\n\n  -- 未识别到 consumer 或未配置 allow_ips:直接拒绝\n  if not consumer or not allow or allow == \"\" then\n    return ngx.exit(403)\n  end\n\n  -- real-ip 插件生效后,这里就是客户端真实 IP\n  local ip = ngx.var.remote_addr\n\n  -- allow_ips 支持 CIDR,逗号分隔\n  local ips = {}\n  for token in string.gmatch(allow, \"([^,%s]+)\") do\n    table.insert(ips, token)\n  end\n\n  local ipmatcher = require(\"resty.ipmatcher\")\n  local matcher = ipmatcher.new(ips)\n  if not matcher or not matcher:match(ip) then\n    return ngx.exit(403)\n  end\nend"
  ]
}
配置response-rewrite插件(可选)
搜索response-rewrite并配置如下内容,作用是给响应加一个 HTTP 头,把它的值设为当前连接看到的客户端 IP。
{
  "headers": {
    "x-remote-addr": "$remote_addr"
  }
}
配置real-ip插件
搜索real-ip并配置如下内容,作用是让 APISIX 在“前面有 LB / 反向代理”的情况下,把请求里某个 header(或 query 参数)携带的 IP,当作真实客户端 IP,从而更新 $remote_addr 之类的变量给后续插件 / 日志使用。
trusted_addresses:只信任本地回环 IP(127.0.0.1/32)和 docker 网络 ip 段(172.16.0.0/12)的请求
{
  "trusted_addresses": [
    "127.0.0.1/32",
    "172.16.0.0/12"
  ],
  "recursive": false,
  "source": "http_x_real_ip"
}
配置完成后保存即可,记住该Plugin Config的 ID,一会需要填到Routes的Plugin Config ID中
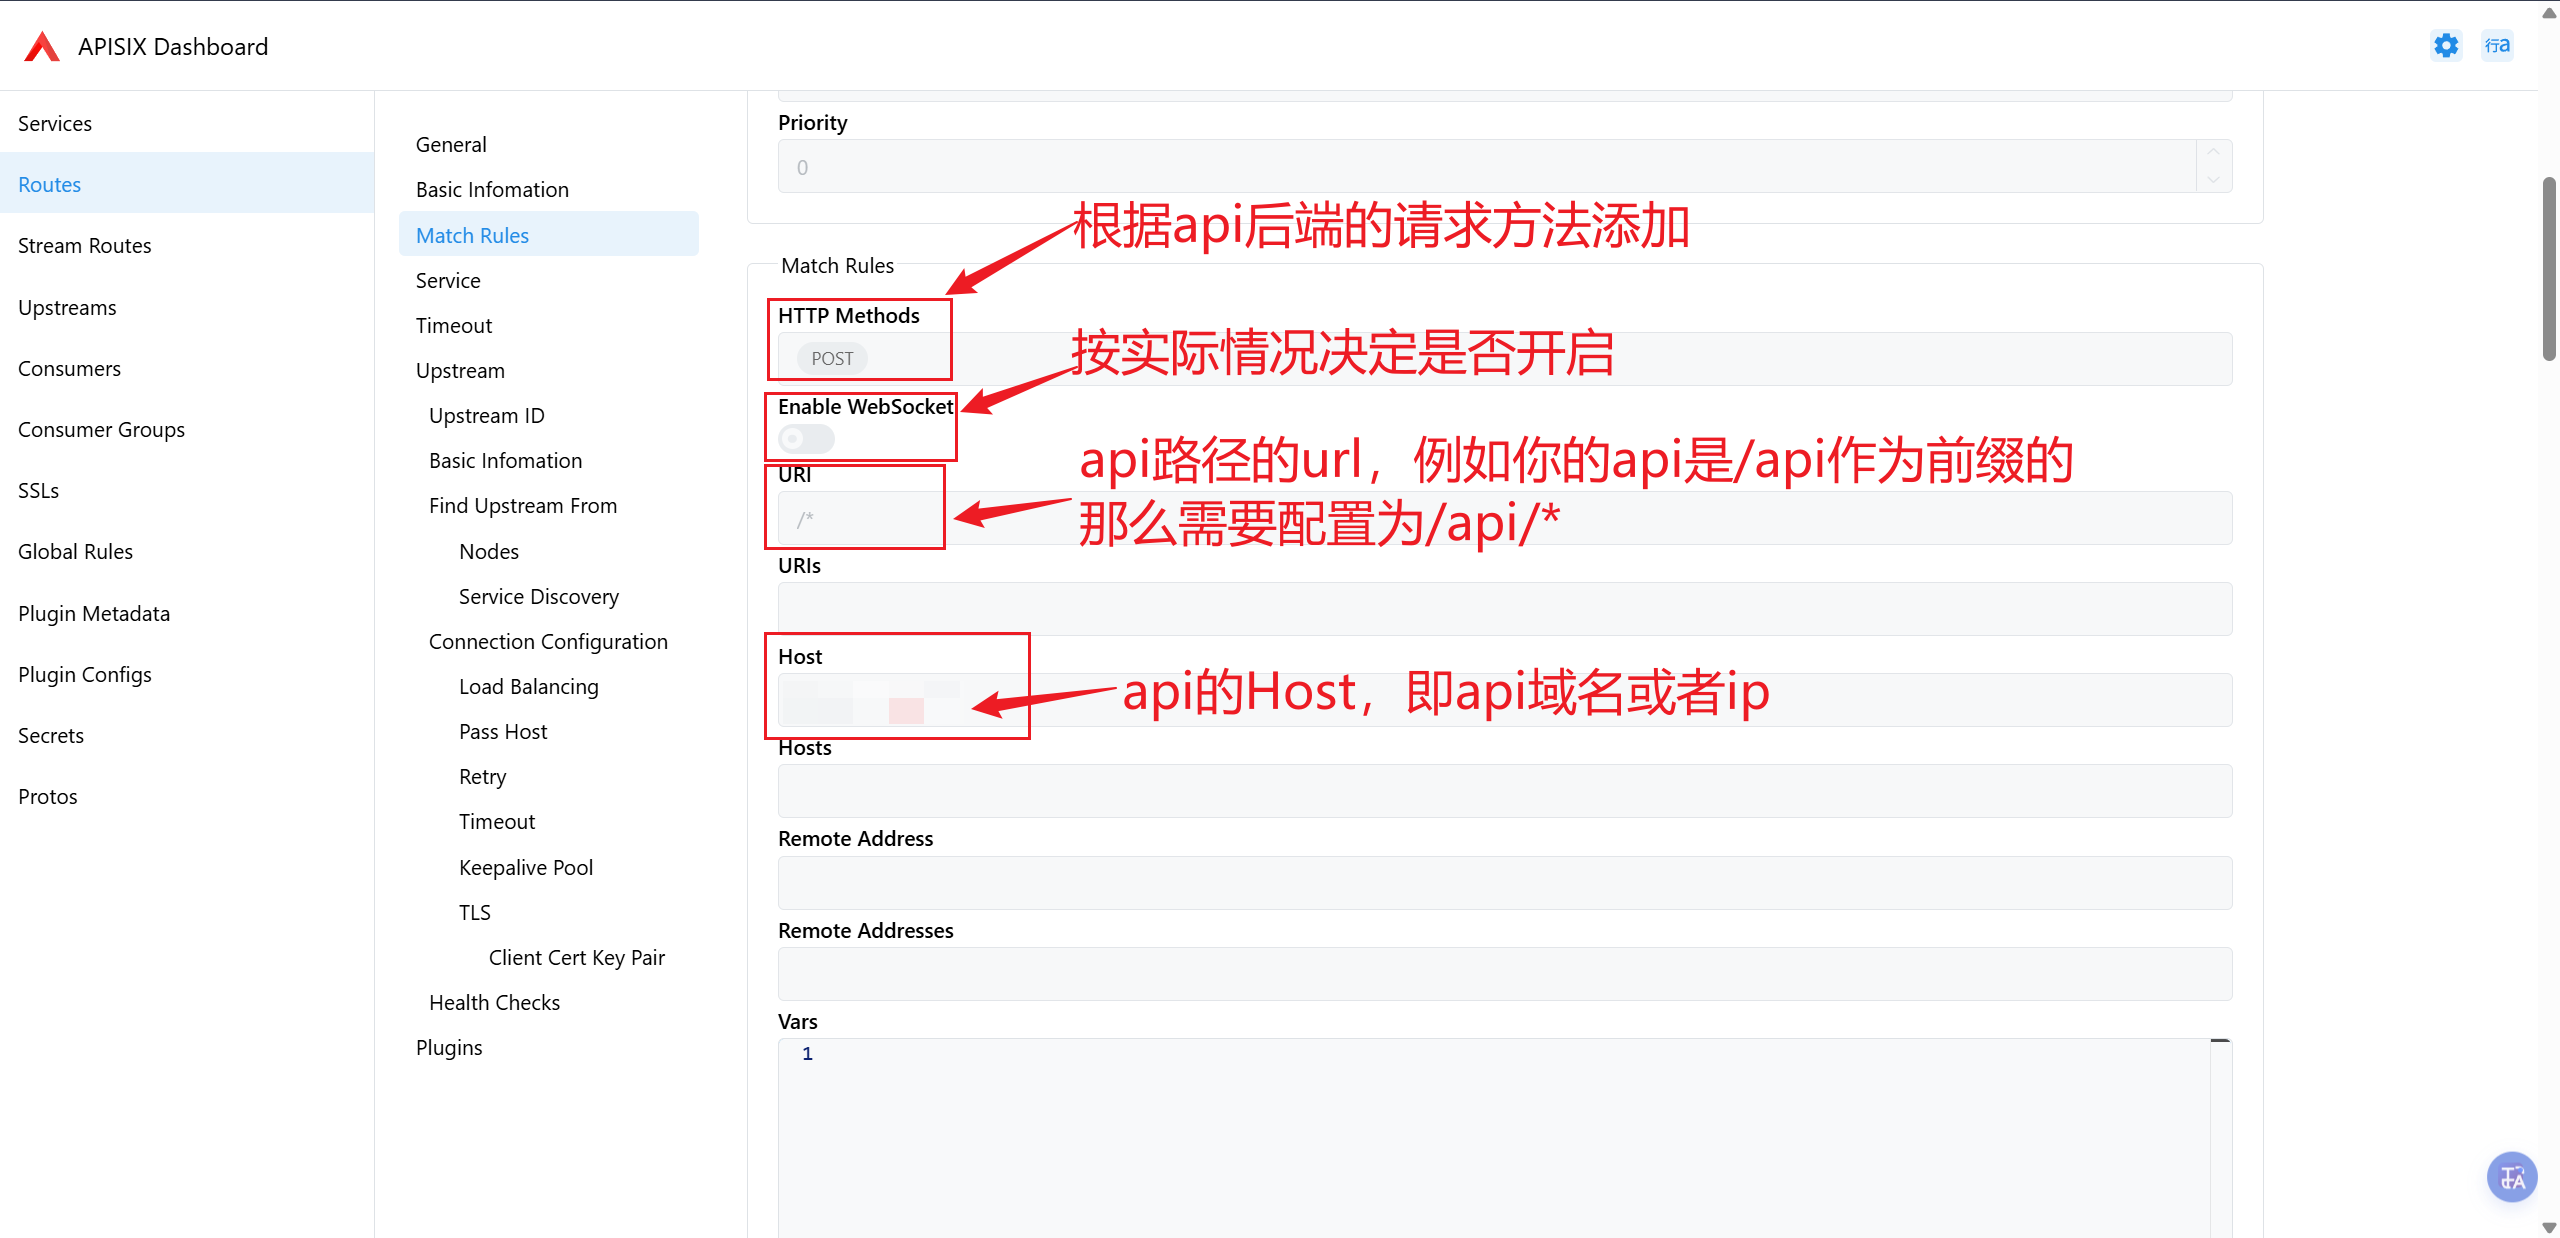
配置Routes
访问 Routes——>Add Routes 进入添加界面,我们主要配置Match Rules、Upstream ID和添加key-auth、serverless-pre-function、response-rewrite和real-ip四个插件即可。
配置Match Rules
配置Upstream ID
Upstream ID即为上一步创建Upstreams完后的 ID,只需要填写Upstream ID即可
添加并配置插件
配置Routes Plugin Config
将上上步配置的Routes Plugin Config填到Plugins——>Plugin Config ID处,然后保存Routes即可,至此 Routes 配置完成
配置Consumers
访问Consumers——>Add Consumers进入添加界面,我们主要配Username 、Labels和添加key-auth插件即可。
这不主要是配置认证凭证的,Username 可以任意,Labels 主要是保存用户请求的 ip(用于 ip 白名单识别的),key-auth插件设置api-key的,
配置Labels
由于我们是要实现 IP 白名单的效果的,所以用Labels保存可以请求的 IP,这里 ip 先随便写,后续我们创建一个接口实现自动更新这里的 ip
allow_ips:1.1.1.1/32
配置key-auth插件
搜索key-auth并配置如下内容,作用是用户请求该 api 时必须携带apikey头部 (Header),其值为api-key(要复杂一些),否则会返回 403
{
  "key": "api-key(要复杂一些)"
}
更新原API反向代理设置
由于之前的 API 是通过 nginx 反向代理到 80 端口并绑定域名的,现在需要将反向代理的端口改为 apisix 的 9080 端口。
修改nginx配置文件中的proxy_pass
proxy_pass http://127.0.0.1:原API端口;
更改为
proxy_pass http://127.0.0.1:9080; //9080为apisix处理用户/业务请求的端口
新增加白接口
使用 python 创建一个加白接口实现调用该 API 后则根据请求中的
Query参数Username,其值为创建Consumers时设置的Username和 body 里的 json 的 ip 和key( 即创建Consumers时设置的key-auth插件的api-key的值 )。只有Username和key对应时才能更新Labels里的 ip 并加锁 30 分钟,在 30 分钟内不允许再次更改 ip
创建一个verify-api.py文件
import os
import time
import threading
import logging
from typing import Any, Dict, Optional

import requests
from fastapi import FastAPI, HTTPException, Query
from pydantic import BaseModel, Field

# ----------------------------
# 配置
# ----------------------------
APISIX_ADMIN_URL = os.getenv("APISIX_ADMIN_URL", "http://127.0.0.1:9180")
APISIX_ADMIN_KEY = os.getenv("APISIX_ADMIN_KEY", "your-admin-api-key")
# APISIX consumer admin api 路径:通常为 /apisix/admin/consumers/{id}
APISIX_CONSUMER_PATH = os.getenv("APISIX_CONSUMER_PATH", "/apisix/admin/consumers")

LOCK_TTL_SECONDS = int(os.getenv("LOCK_TTL_SECONDS", "1800"))  # 30分钟

# 日志:显示具体时间(到毫秒)+ 级别 + 消息
logging.basicConfig(
    level=logging.INFO,
    format="%(asctime)s.%(msecs)03d %(levelname)s %(message)s",
    datefmt="%Y-%m-%d %H:%M:%S",
)
logger = logging.getLogger("consumer-ip-guard")

app = FastAPI(title="APISIX Consumer Verify API", version="1.0.0")

# ----------------------------
# 30分钟更新锁(进程内)
# 单实例可用;多实例请替换为 Redis 分布式锁(例如 username 作为 key)
# ----------------------------
_lock_guard = threading.Lock()
_update_locks: Dict[str, float] = {}  # username -> expire_epoch


def _now() -> float:
    return time.time()


def _event_time_str(epoch: Optional[float] = None) -> str:
    t = epoch if epoch is not None else _now()
    return time.strftime("%Y-%m-%d %H:%M:%S", time.localtime(t))


def lock_get_expire(username: str) -> Optional[float]:
    with _lock_guard:
        exp = _update_locks.get(username)
        if exp is None:
            return None
        if exp <= _now():
            _update_locks.pop(username, None)
            return None
        return exp


def lock_set(username: str, ttl_seconds: int = LOCK_TTL_SECONDS) -> float:
    with _lock_guard:
        exp = _now() + ttl_seconds
        _update_locks[username] = exp
        return exp


# ----------------------------
# 请求体
# ----------------------------
class VerifyBody(BaseModel):
    ip: str = Field(..., description="请求端IP,例如 1.1.1.1 或 1.1.1.1/32")
    key: str = Field(..., description="key-auth 的 key")


# ----------------------------
# APISIX 调用封装
# ----------------------------
def _headers() -> Dict[str, str]:
    # APISIX Admin API 常用 header:X-API-KEY
    return {
        "X-API-KEY": APISIX_ADMIN_KEY,
        "Content-Type": "application/json",
        "Accept": "application/json",
    }


def apisix_get_consumer(username: str) -> Dict[str, Any]:
    """
    约定:consumer id = username
    如果你们 APISIX consumer id 不是 username,请在这里改映射逻辑(例如先 list 再按 username 匹配)。
    """
    url = f"{APISIX_ADMIN_URL}{APISIX_CONSUMER_PATH}/{username}"
    r = requests.get(url, headers=_headers(), timeout=5)
    if r.status_code == 404:
        raise HTTPException(status_code=404, detail=f"Consumer 不存在: {username}")
    if not r.ok:
        raise HTTPException(status_code=502, detail=f"查询 APISIX 失败: {r.status_code} {r.text}")
    data = r.json()

    # APISIX Admin API 常见返回:{"key": "...", "value": {...}}
    value = data.get("value")
    if not isinstance(value, dict):
        raise HTTPException(status_code=502, detail=f"APISIX 返回结构异常: {data}")
    return value


def apisix_put_consumer(username: str, consumer_value: Dict[str, Any]) -> Dict[str, Any]:
    url = f"{APISIX_ADMIN_URL}{APISIX_CONSUMER_PATH}/{username}"
    r = requests.put(url, headers=_headers(), json=consumer_value, timeout=5)
    if not r.ok:
        raise HTTPException(status_code=502, detail=f"更新 APISIX 失败: {r.status_code} {r.text}")
    return r.json()


def extract_allow_ips_label(consumer_value: Dict[str, Any]) -> Optional[str]:
    labels = consumer_value.get("labels") or {}
    if isinstance(labels, dict):
        return labels.get("allow_ips")
    return None


def extract_keyauth_key(consumer_value: Dict[str, Any]) -> Optional[str]:
    plugins = consumer_value.get("plugins") or {}
    if not isinstance(plugins, dict):
        return None
    ka = plugins.get("key-auth") or plugins.get("key_auth")  # 兼容写法
    if not isinstance(ka, dict):
        return None
    return ka.get("key")


def normalize_ip_cidr(ip: str) -> str:
    ip = ip.strip()
    # 如果没带掩码,默认 /32
    if "/" not in ip:
        return f"{ip}/32"
    return ip


# ----------------------------
# 路径 2:校验并按需更新 allow_ips(30分钟锁)
# ----------------------------
@app.post("/consumer/verify")
def verify_consumer(
    body: VerifyBody,
    Username: str = Query(..., description="Consumer Username(也作为 consumer id)"),
) -> Dict[str, Any]:
    requested_ip_raw = body.ip
    requested_ip = normalize_ip_cidr(body.ip)
    requested_key = body.key.strip()

    consumer = apisix_get_consumer(Username)
    current_allow_ips = extract_allow_ips_label(consumer)
    current_key = extract_keyauth_key(consumer)

    if not current_key:
        raise HTTPException(status_code=500, detail="Consumer 未配置 key-auth.key")

    # key 不匹配:拒绝,不更新 allow_ips
    if requested_key != current_key:
        logger.warning(
            "time=%s user=%s key_mismatch deny requested_ip_raw=%s requested_ip=%s",
            _event_time_str(),
            Username,
            requested_ip_raw,
            requested_ip,
        )
        raise HTTPException(status_code=401, detail="key 验证失败")

    # key 匹配后,ip 相同:成功且无变化
    if current_allow_ips == requested_ip:
        msg = f"user:{Username}验证成功,ip无变化"
        logger.info(
            "time=%s user=%s verify_ok ip_no_change allow_ips=%s requested_ip=%s",
            _event_time_str(),
            Username,
            current_allow_ips,
            requested_ip,
        )
        return {"message": msg, "allow_ips": current_allow_ips}

    # allow_ips 不同:检查 30 分钟锁
    exp = lock_get_expire(Username)
    if exp is not None:
        remain = int(exp - _now())
        logger.warning(
            "time=%s user=%s ip_update_locked remain=%ss ip_change=%s -> %s",
            _event_time_str(),
            Username,
            remain,
            current_allow_ips,
            requested_ip,
        )
        raise HTTPException(
            status_code=423,
            detail=f"ip 更新已锁定,剩余 {remain}s,禁止再次更新",
        )

    # 执行更新:labels.allow_ips 改为请求 ip,并加锁 30 分钟
    labels = consumer.get("labels")
    if not isinstance(labels, dict):
        labels = {}
    labels["allow_ips"] = requested_ip

    # 只提交允许字段,避免 forbidden: create_time/update_time 等
    payload = {
        "username": consumer.get("username", Username),
        "labels": labels,
        "plugins": consumer.get("plugins", {}),
    }

    apisix_put_consumer(Username, payload)
    new_exp = lock_set(Username, LOCK_TTL_SECONDS)

    logger.info(
        "time=%s user=%s ip_updated ip_change=%s -> %s locked_until=%s",
        _event_time_str(),
        Username,
        current_allow_ips,
        requested_ip,
        _event_time_str(new_exp),
    )

    return {
        "message": f"user:{Username} allow_ips已更新并锁定30分钟",
        "old_allow_ips": current_allow_ips,
        "new_allow_ips": requested_ip,
        "lock_expires_at_epoch": new_exp,
        "lock_expires_at": _event_time_str(new_exp),
        "lock_ttl_seconds": LOCK_TTL_SECONDS,
    }
所需依赖
fastapi uvicorn requests pydantic
然后添加环境变量
APISIX_ADMIN_URL="http://127.0.0.1:9180"
APISIX_ADMIN_KEY="你的Admin API Key"
启动
uvicorn verify-api:app --host 0.0.0.0 --port 32080 //32080可以自定义
补充:套用CloudFlare后获取请求真实IP
定时获取更新CloudFlare的回源IP
在/usr/local/bin/目录下创建一个update-cloudflare-ips.sh脚本用于拉取 CloudFlare 的回源 IP 并生成一份 Nginx 配置文件
#!/usr/bin/env bash
set -euo pipefail

OUT=/www/server/nginx/conf/cloudflare-realips.conf
TMP=/tmp/cloudflare-realips.conf.$$

CF4="https://www.cloudflare.com/ips-v4"
CF6="https://www.cloudflare.com/ips-v6"

# 下载并格式化
{
  echo "# Generated from Cloudflare IP lists: $CF4 and $CF6"
  echo "# Generated at $(date -u +"%Y-%m-%dT%H:%M:%SZ")"
  echo ""
  echo "# IPv4"
  curl -fsS "$CF4" | sed -e 's/^/set_real_ip_from /; s/$/;/' || { echo "failed to download $CF4"; exit 1; }
  echo ""
  echo "# IPv6"
  curl -fsS "$CF6" | sed -e 's/^/set_real_ip_from /; s/$/;/' || { echo "failed to download $CF6"; exit 1; }
  echo ""
  echo "# End"
} > "$TMP"

# atomically move
mv "$TMP" "$OUT"
chown root:root "$OUT"
chmod 644 "$OUT"

# reload nginx (如果你的系统用 systemd)
if command -v systemctl >/dev/null 2>&1; then
  systemctl reload nginx || nginx -s reload
else
  nginx -s reload
fi
如果使用的是宝塔或者 1panel 等面板管理的服务器可以直接使用计划任务添加定时运行该脚本的定时任务,也可以使用systemd timer或者cron实现
用 cron实现定时任务
sudo crontab -e
例如每天凌晨 3:15 更新一次,并写日志:
15 3 * * * /usr/local/bin/update_cf_realips.sh >> /var/log/update_cf_realips.log 2>&1
用systemd timer实现
先创建 service 文件:/etc/systemd/system/update-cf-realips.service
[Unit]
Description=Update Cloudflare real IP ranges for Nginx

[Service]
Type=oneshot
ExecStart=/usr/local/bin/update_cf_realips.sh
在创建 timer 文件:/etc/systemd/system/update-cf-realips.timer
[Unit]
Description=Run update-cf-realips daily

[Timer]
OnCalendar=daily
Persistent=true

[Install]
WantedBy=timers.target
启用并启动:
sudo systemctl daemon-reload
sudo systemctl enable --now update-cf-realips.timer
sudo systemctl list-timers | grep update-cf-realips
更新nginx配置
修改/etc/nginx/nginx.conf(根据自己情况修改配置文件)
在http {} 里添加
# 使用 Cloudflare 传递的真实客户端头
real_ip_header CF-Connecting-IP;
real_ip_recursive on;

# 包含由云端ip生成的文件(由脚本维护)
include /www/server/nginx/conf/cloudflare-realips.conf;
重载 nginx 使配置生效
sudo nginx -s reload